Saturday, March 1, 2014

Month 13: Visual Effects 1/Character Animation 1

Alright so I literally just submitted the last thing for these classes an hour ago so I can finally breath a bit, and update this.

This was another super busy month with little sleep. Our classes were pretty small again which is always great. Both our classes had labs at 5 am, so 6 days a week I would have to be up at 4 =( My VEF class had its lecture later in the day so I would have to go back to school again for that. Usually I would just stay on the campus all day and try to get stuff done.  So VEF is visual effect and it deals with creating special effects using dynamics.

VISUAL EFFECTS!!!
(my cdc character in my melting woman scene)

Within the 3d package Maya there is all kinds of things you can do with dynamics. This was our introduction class and we had 5 projects. For each project we had to create an effect simulation. I tryed to take each of these projects as far as I could with the time provided and I rendered out everything! To recap, rendering is the process of Maya actually calculating all the textures and lights in my scene and creating a picture like the one above. Just 1 frame (24 frames in 1 second) could take 30 seconds-8 minutes. For actual movies like transformers and stuff each frame could take days.

OK... so our first project was RIDGED BODIES. Its kinda wordy to explain but its basically simulating collisions and hard surface interactions by using simulated gravity and other fields.

We had to create a mouse trap style simulation... here was mine

Ill list the render times above the videos. I could have easily cut back my render times by doing a few things I learned later and by using less reflective materials... but I like having reflections =)

                    THE QUALITY on all these videos have been butchered, but you get the idea.                      

                                         (6 hours to render on 7 computers)


Next we had 3 particle projects. We a list of effects we could choose from and for each project we had to choose 2 effects to simulate.

The course director gave us creative control of how we set up our scenes and how we set up our effects.

The first 2 effects I chose were water and steam
 This steel mill scene was provided for us so for the first 2 projects I used that scene. All the other scenes you see were created by me.
                                          4 hours on 8 computers

Did fire and smoke next

                                          again 4 hours on 8 or so computers

This one was my favorite and I found some sound effects on google and edited them in for fun.
This actually only took 4 hours on just my computer so it was a really easy render.
 --Fireworks and snow


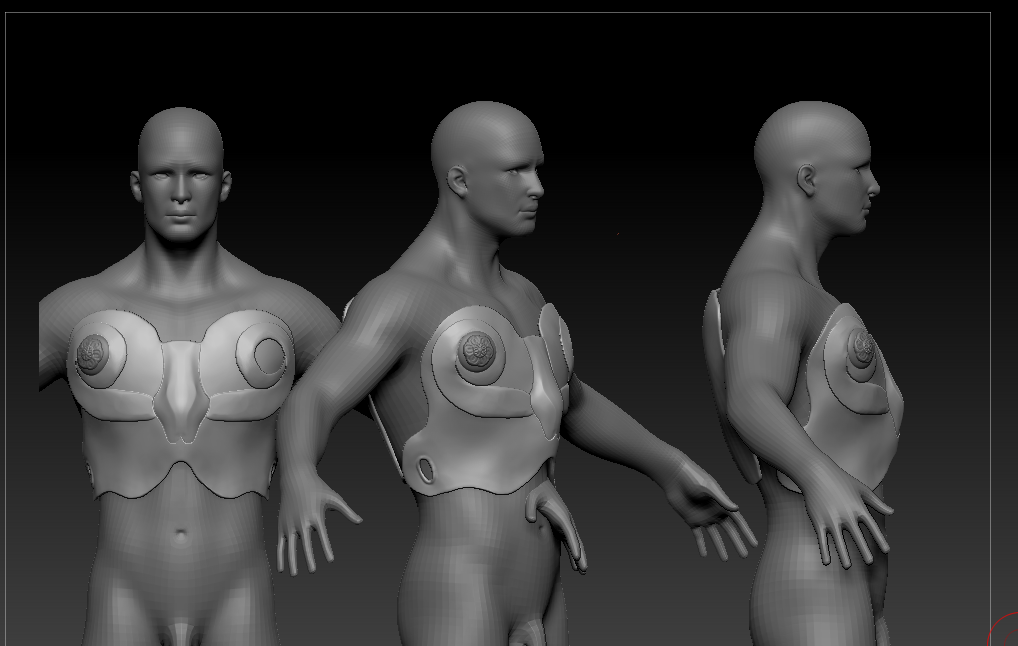
So that was the last particle project our last project was a soft bodies project. I decided to take the chararacter I made a few months back and try to melt her.... it was very terminator 2 inspired.
I am not compleatly happy with how her melt went... but it still looks pretty cool

This took 8 minutes to render per frame for 140 frames.... that's a lot of rendering.... 
here is a still shot

So those were my VEF projects, I thought it was a pretty kick ass class and am excited for VEF 2 in a few months. It really got me into dynamic effects.


------------------------------------------------------------------------------------------------------------------------

Next I had Character animation 1. This class mostly focused on animating a walk cycle including a few facial expressions.

We had 3 projects. The first project was just animating a simple walk, turn around, and I added a jump to mine. It was LEGS only to start out simple

I realize these animations look pretty cartoony, but that is how they wanted them.

Legs down walk

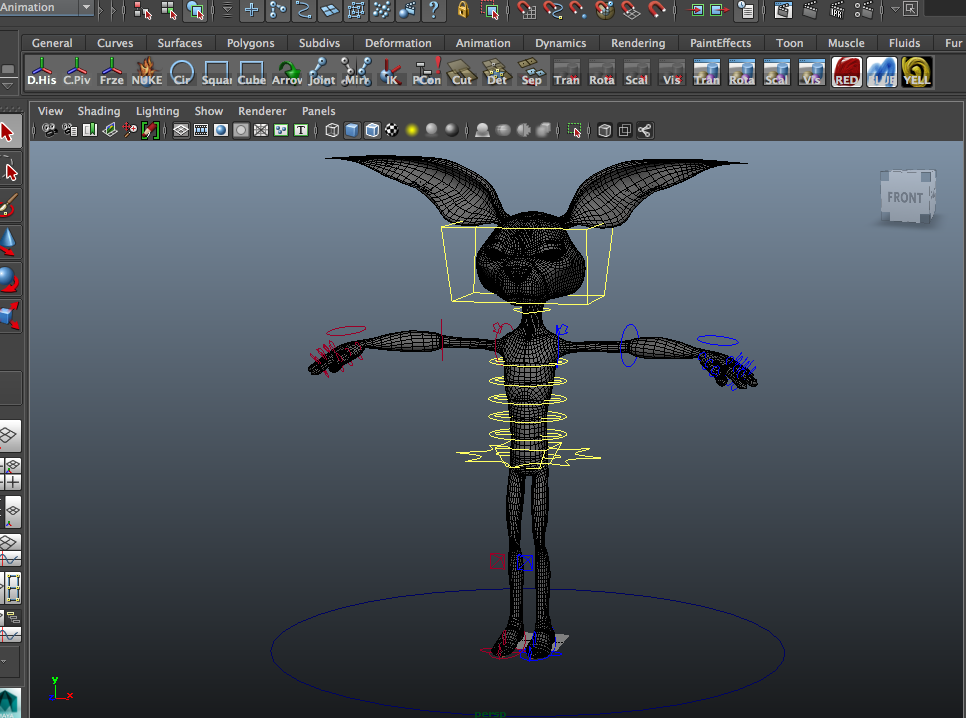
Next we had to use our character we would be working with in the future to create a few strong poses.

Here is some pre production drawings I did followed by my strong poses project


Posed out character


For our final project  we had to do a few more drawings then do a simple walk/turnaround/button push. There were also a lot of other small things we had to do like expressions/ blinks/antenna and tail movement/anticipations... and about 200 small other things.

Here was my prePro


and here is the final product about 80 hours later.

BAM... that was my month

Feel pretty confident I did well in both classes. I have had 0 time to do any modeling this month, but hopefully I will get some time tomorrow before classes start again on Monday =(


Next month I hit up Motion Capture and Visual Development.... 4 days off all month =(

Month 12: Character Rigging 2/Professional Communication andPresentation-Online


Alright, an update is overdue. Things have been very busy as I jumped back onto my accelerated schedule. The few days I get off I usually spend catching up on home work.

So in January I took my second, and final rigging class as well as an online public speaking class. Yes... an online public speaking class.....

Ok so in Rigging 2  we had a very small class (only 6) which is pretty awesome for 1 on 1 time. We were gave a troll/ogre character that was modeled by our course director and we had to do several things with it.

First we had to select an already made motion capture file and attach it to the troll. A motion capture file is what is made when people dress up in those suits with all the balls all over that basically sends their movements to a computer. So we were essentially attaching that to the troll.

Then there were several clean up phases where we cleaned up the animation in places that things did not deform properly. Because the trolls body is not exactly like our motion capture data it would look a bit broken at first

Notice it in the ears, arm pit area, and under the belly.
So several days and hours later when it is more or less cleaned up we started doing some other things.

We added some rigging in the face so we can control different parts of the face. And I animated my shot camera to make the scene a bit more interesting.
In this video I left the controls on to give an idea what they look like.


So after this stage we did some dynamics trickery and gave a few pieces of the trolls body jiggle. We also added fur and a hair system to the troll.

With hair system and jiggle. The hair system has a few issues here so it looks kinda crazy.


Here is a rendered out frame to get an idea of what its looking like.
Before the mouth got textured.

So I did not get the time to render the whole shot, would have like to have posted that.

Overall it was a really cool class, even though I doubt ill be rigging much in the future.

I don't have any content to include for my online public speaking class. We basically did a couple speeches on our computers and timed them to a slideshow presentations. I did my final speech on how to live within your means as a student =)

---------------------------------------------------------------------------------------------------
Because one of my classes was online I had some extra time and did some modeling stuff.
Here are a few projects I worked on for practice.

Bridge from Concept art
Never got to finishing this... classes started again. At this point I would rather work on other stuff.

Zombie creation
I used a bunch of zombie pictures I found on google and created this skeleton zombie guy.


OHHH also I almost forgot, my final project from MCR back in May was framed and hung up in the front of the 3d arts building along with 5 others. Very COOL! This was really cool because up to this point all they had put up on the walls was the work we do in our traditional art classes, it was really neat to see some 3d work.


So that's it, that was my January

Sunday, December 22, 2013

Month 11: Production Modeling

This month was PRM or production modeling. It is the last modeling class I will get and also the hardest one. The grading is really tuff as they base your grades on how close they are to being production ready.

So everyone in the class was exposed to new software called ZBrush.  It is software for digital sculpting and is used in games and movies all the time for CG models.

After one class of discussing how zbrush works we were to sculpt a sword and a cat skull.
Here were mine,


This was based on some Warcraft concept art


 After these, we started on our speed sculpts.

 Speed sculpts were divided into three categories, characters, hard surface, and environments. For each category we had to do 3 sculpts based on their reference pictures.

Im going to post the reference pictures our class received, followed by my sculpts. Each sculpt took roughly 6-30 hours.

CHARACTERS


I went with the dragon.


I chose the coolest one by far.

 
 That one took a long time and was a huge learning experience.


 I ran out of time for this one


Next we did HARD SURFACE stuff


This guy would turn into my final, for this we only had to do the arm.


game of thrones throne concept


 this was the hard surface I ran outta time on


On the last day of our speedsculpts we did ENVIRONMENT.


This was a fun one


 after our speed sculpts we did a a painting project and a few more random sculpts.


 From here we did a few more things that I wont talk about.

After those things we had to pick our final. For our final we had to go back to one of our speedsculpts and refine it and do a better job on it. Because I had taken all my sculpts pretty far I took the hard surface arm that I did and decided to do the entire character. Here are my progression sculpts from my final as well as the original reference.

Reference Picture For final


Chest work in progress

 Chest finished


Helm Finished


Pants wireframe


Pants Complete

 So that was all my stuff from this month. Again my efforts were noticed and I won the course directors award for this class. Really enjoyed this stuff and would like to turn it into a career if things go my way.

Thanks for reading, Merry Xmas =)

Saturday, November 30, 2013

Month 10: Character Rigging 1

Ok so I came into this program with 22 months of GI bill benefits left, my program is 21 months long. This means that I had 1 extra month of benefits. So due to the fact that Nov and Dec classes would have been very compressed, as well as that the classes I would have been taking during those months were very time demanding, I decided to only take 1 class for both Nov and Dec and use that extra month I had. So for the month of November the ONLY class I had was character rigging 1.

Not a super interesting class visually so I wont be posting to many pictures. I used a lot of the extra time I had preparing for Decembers class (production modeling) and learning the software for that class (zbrush). Ill toss in some of the practice I was doing in zbrush at the end of this post.

So rigging is a 2 part class (cri1 and cri2) and probably the most dreaded class for student in this program. Its a lot of work and it gets very technical. There is scripting involved using a scripting language called python.

Rigging, (for this month) is creating a skeleton joint system , and controls to move that skelaton for the people that will be animating the characters.

Here is an example of my model after everything was done.


Here is what the joint skeleton looks like ...


here is a render I did with some lights of a pose that I made my character do using the rig system that I made

You will notice the breaks in the character all over where things are moved and stretched, this is normal and something we wont correct until our next rigging class.

I got a perfect score on my bunny rig and am still waiting on the grades for the scripting portion of the class. Im not going to go into the scripting, it gives me a headache. 


------------------------------------------------------------------------------------------------------------------------
So im excited for next months class PRM or production modeling so I have been trying to learn the software (ZBrush)

Its a digital sculpting software that is great for organic modeling. It is my last modeling class so I really wanna push myself. Here is a couple things I made using online tutorials and copying reference pictures.


Hopefully ill have some awesome stuff next month to show off.
Happy Holidays to anyone reading.

Month 9: Compositing Fundementals/Animantion Fundementals

So I have not updated in a while, things have been a bit compressed leading up to the holidays. Thanksgiving break is here though, so ill update the last 2 months.

So through Oct/Nov/Dec the months schedule gets compressed to allow for the holiday breaks. What this means to us is that our already crazy schedule gets ridiculous. In the month of October I had 1 day off from classes. So considering the heavy homework load, this was a very difficult month. Where I usually take my days off to catch up, or get ahead, or to just solidify new information with practice, this month was more just trying to keep up.

Ok so compositing  first.

So what is compositing.... compositers are the last people in the pipeline. They take all the pieces of a project and blend them together for the final finished product may it be a movie, game, commercial, or whatever. The idea is usually working with layers and blending them together. We worked with a professional composting program called NUKE.

Here is what Nuke looks like....


So in this class we worked with mostly movie files doing stuff kinda like what I used to do in photoshop but on a much more professional level, and to movie files, not pictures.

Here is one I did applying a tattoo in motion.
another one applying a tracker to the words so that they follow the scene


 We also did some layering of images in 3d space to create the illusion of depth. This is done all the time in movies to make scenes look more 3d.


 This is an example of taking several passes and composting them together. So this entire scene started out broken apart, it was then our job to combine all the elements together.


The car alone had about 8 different pieces such as the basic colors of the car, the highlights, the reflections, the shadows, the headlight flares and so on. The same with the background. Then we add motion blur, specular highlight, scene framing, and color corrections to achieve a final desired look. The reason to have all this stuff separated is so we can tweak it how we want it.

So there was TONS more that we learned such as rotoscoping, color correction, working with green screens and more, but I dont wanna go on forever so that's all ill say about that.

-------------------------------------------------------------------------------------------------------

So the other class I took this month was my first 3d animation class.
In this class we animated simple models doing simple things, kind of like we did in 2d animation, but now in 3d. Animating well is very time consuming and very subjective. While I dont mind animating, its not really my thing.
Im only going to showcase our final project which was a 13 second clip of some legs kicking a ball, then the ball bouncing.  Ill first show a work in progress video followed by my final polished clip.

WORK IN PROGRESS animation
FINAL SUBMISSION

The idea was to show weight, movement, stretching, squashing and other animation principles.
This 12 second clip probably took 20-40 hours.

That was all for this month!