Alright so this month we had our second composting class, and our second visual effects class. Ill talk about COMPOSITING and SCENE FINISHING first.

(still frame from project 4...ITS ME)
So just to recap what compositing is ... this is the trade of combing film/cg elements. When you see in movies all the cool stuff they do with green screens and adding backdrops that blend seamlessly into the shot... that all falls under composting. I am no master at it yet.... but learned heaps about it this month.
We had 4 projects in CSF
Project 1 (welcome back to nuke)
Nuke is an extremely expensive piece of software that is very powerful, and very widely used in film. Our first project was already half done for us... our job was to recreate it an expand on it. This project was designed to re-familiarize us with the software.
We had to take an already rendered out sequence (with passes) and build it into an interesting sci-fi scene.
So we got this.................(PROJECT 1)

From this rendered out sequence, we extracted out several passes I will show below


Alright so Using these passes and the magic of Nuke we were given some creative control to customize our shot.... After a lot of tweaking and playing this was mine.

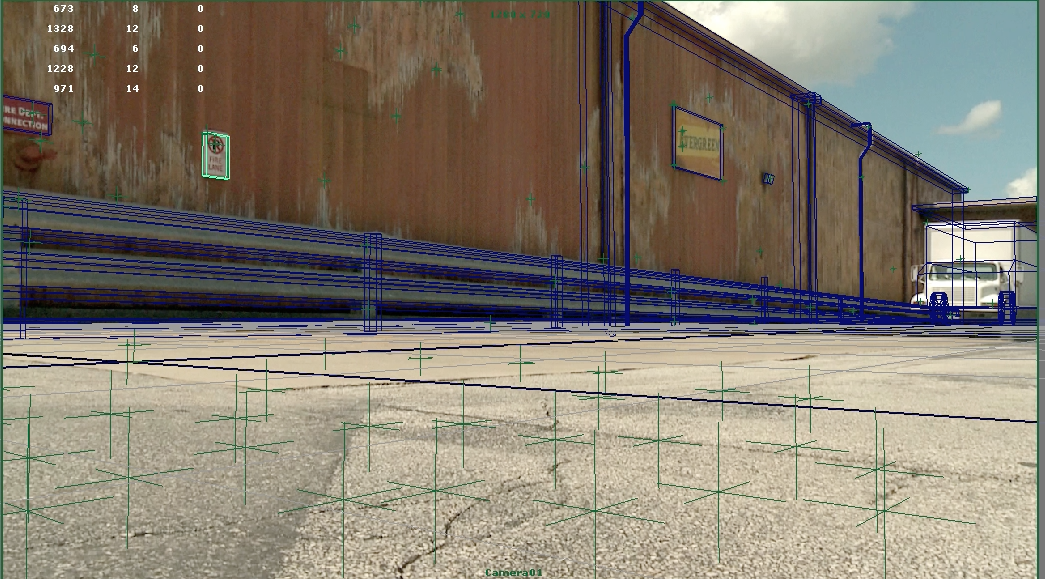
Our next project was a tracking project in new software called syntheyes. (PROJECT 2)
For this we took a video clip and tracked it

For PROJECT 3 we did the same project we did for project 1 but this time in class we filmed each of our faces moving around, we then tracked our face footage, we then attached the already build armor suit model to our face, and then composted it into a scene.
Here is a still shot after I had finished attaching the movie tracking data to the armor

This was the Final Composite after everything....
For our final project (Matte Painting) we paired up with the film students. We were to take an establishing shot from their project and create a matte painting for it based on their instruction. This was what my shot looked like when its spread out into one image.

The film students wanted
-all the stuff to the right of the building gone, they wanted it replaced with a French quarters style street.
-they wanted kind of an industrial city in the background
-they wanted a 3rd story added to the building
-They wanted it to look kind dirty with trash and have grafitti on the building
-They wanted the time of day to be the morning.
This is how my matte painting looked when I was done with it

There is definitely a few issues with it, but I am pretty pleased for my first matte painting.
So that was it for CSF.
------------------------------------------------------------------------------------------------------------------------
The other class I took this month was Visual Effects 2.

Visual Effects 2 had us working on three projects.
The first project was to find a video of a fire and to try and simulate that fire using maya fluids.
Here was a work in progress picture

Here is a still shot from the final

After project 1 we started working with Houdini. Here are some clouds I believe we created in Houdini.


For our final project we were gave complete freedom to research anything we wanted and to create a simulation. I took this as an oppertunity to install a trial version of Realflow and play around with it. Realflow is mostly for fluid simulation.
I found realflow to be really cool, here is a few of the tings I did in a short period of time.


full simulations
That is all for this month!... I am going to use my free time off this coming month to prepare for finals.