Saturday, November 30, 2013

Month 10: Character Rigging 1

Ok so I came into this program with 22 months of GI bill benefits left, my program is 21 months long. This means that I had 1 extra month of benefits. So due to the fact that Nov and Dec classes would have been very compressed, as well as that the classes I would have been taking during those months were very time demanding, I decided to only take 1 class for both Nov and Dec and use that extra month I had. So for the month of November the ONLY class I had was character rigging 1.

Not a super interesting class visually so I wont be posting to many pictures. I used a lot of the extra time I had preparing for Decembers class (production modeling) and learning the software for that class (zbrush). Ill toss in some of the practice I was doing in zbrush at the end of this post.

So rigging is a 2 part class (cri1 and cri2) and probably the most dreaded class for student in this program. Its a lot of work and it gets very technical. There is scripting involved using a scripting language called python.

Rigging, (for this month) is creating a skeleton joint system , and controls to move that skelaton for the people that will be animating the characters.

Here is an example of my model after everything was done.


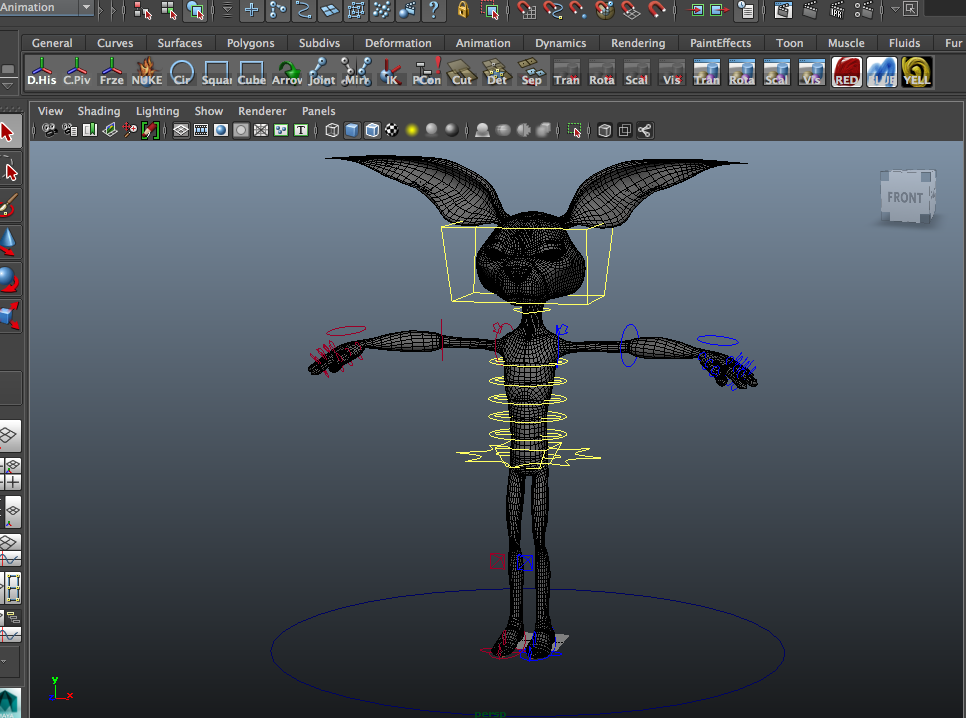
Here is what the joint skeleton looks like ...


here is a render I did with some lights of a pose that I made my character do using the rig system that I made

You will notice the breaks in the character all over where things are moved and stretched, this is normal and something we wont correct until our next rigging class.

I got a perfect score on my bunny rig and am still waiting on the grades for the scripting portion of the class. Im not going to go into the scripting, it gives me a headache. 


------------------------------------------------------------------------------------------------------------------------
So im excited for next months class PRM or production modeling so I have been trying to learn the software (ZBrush)

Its a digital sculpting software that is great for organic modeling. It is my last modeling class so I really wanna push myself. Here is a couple things I made using online tutorials and copying reference pictures.


Hopefully ill have some awesome stuff next month to show off.
Happy Holidays to anyone reading.

Month 9: Compositing Fundementals/Animantion Fundementals

So I have not updated in a while, things have been a bit compressed leading up to the holidays. Thanksgiving break is here though, so ill update the last 2 months.

So through Oct/Nov/Dec the months schedule gets compressed to allow for the holiday breaks. What this means to us is that our already crazy schedule gets ridiculous. In the month of October I had 1 day off from classes. So considering the heavy homework load, this was a very difficult month. Where I usually take my days off to catch up, or get ahead, or to just solidify new information with practice, this month was more just trying to keep up.

Ok so compositing  first.

So what is compositing.... compositers are the last people in the pipeline. They take all the pieces of a project and blend them together for the final finished product may it be a movie, game, commercial, or whatever. The idea is usually working with layers and blending them together. We worked with a professional composting program called NUKE.

Here is what Nuke looks like....


So in this class we worked with mostly movie files doing stuff kinda like what I used to do in photoshop but on a much more professional level, and to movie files, not pictures.

Here is one I did applying a tattoo in motion.
another one applying a tracker to the words so that they follow the scene


 We also did some layering of images in 3d space to create the illusion of depth. This is done all the time in movies to make scenes look more 3d.


 This is an example of taking several passes and composting them together. So this entire scene started out broken apart, it was then our job to combine all the elements together.


The car alone had about 8 different pieces such as the basic colors of the car, the highlights, the reflections, the shadows, the headlight flares and so on. The same with the background. Then we add motion blur, specular highlight, scene framing, and color corrections to achieve a final desired look. The reason to have all this stuff separated is so we can tweak it how we want it.

So there was TONS more that we learned such as rotoscoping, color correction, working with green screens and more, but I dont wanna go on forever so that's all ill say about that.

-------------------------------------------------------------------------------------------------------

So the other class I took this month was my first 3d animation class.
In this class we animated simple models doing simple things, kind of like we did in 2d animation, but now in 3d. Animating well is very time consuming and very subjective. While I dont mind animating, its not really my thing.
Im only going to showcase our final project which was a 13 second clip of some legs kicking a ball, then the ball bouncing.  Ill first show a work in progress video followed by my final polished clip.

WORK IN PROGRESS animation
FINAL SUBMISSION

The idea was to show weight, movement, stretching, squashing and other animation principles.
This 12 second clip probably took 20-40 hours.

That was all for this month!